Wednesday, March 9, 2016

How to Utilize Pinterest as a WoodWorker


Getting Started


Sign up for an account at www.pinterest.com.  It's free and is a great resource for a vast array of concepts for your shop.  You can sign up directly through Pinterest, or through your Facebook or Twitter account.

Once registered and set up on Pinterest, you will notice pictures posted on your page.  These are "Pins" posted by others on their accounts.  If you see something you like, click the little red thumbtack on the picture.  Pinterest will then ask you which of your boards you will like to post it to.  If you don't see a board that fits your selection, make a new board.

Start With the Basics


Start with a few basic ideas of what you would like.  I started with various categories, such a techniques, things I would like to build, personal items I have made, and even inspirational ideas.  As you find your boards getting bigger, you can later separate them out into more specific topics.

For instance, I started with a single board called "Must Build" and eventually broke it into separate categories for the kitchen, garden, and workbenches.  Eventually, my kitchen board blossomed into wooden spoons, bowls, cutting boards, salt and pepper shakers, and wine stoppers.  I also keep a board for clocks for inspirational purposes.  I've never made a clock, but would like to keep a collection of ideas before I pull that trigger one day.

A few of the boards on my own Pinterest page.

Make your wish list


Click on pictures or ideas that pique your interest.  They do not have to be things exactly tied to anything you plan on directly doing, but things that inspire you to create.

If the pin is not woodworking related, you may feel a slight hesitation.  Shake it off and click away, we all have other interests besides woodworking.  In addition to my woodworking boards, I also have boards for gardening, grilling, and blacksmithing, among other topics.

One of my favorite things to pin is shop made tools.  Before the industrial revolution, many woodworkers made their own hand tools, and there is a wealth of information on making your own quality hand tools.  I hope one day to dedicate a few posts to just such a topic.

Follow Boards, Not People


One of the great things about Pinterest is that you can follow other posts similar to the ones you like.  When you find a few links you like, follow these boards to get noticed of new links added to it.

However, I do not recommend following your friends or people at all in general if you are only looking for woodworking ideas.  Just because someone posts some really good woodworking pictures, I double check to make sure they do not also have boards for cats, kids, or weddings.  Not that I have anything against these three things, but they are the last posts I want popping up in my feed when I log into Pinterest.

Instead I decide to follow people's individual boards.  By following boards I can keep the junk on my feed to a minimum.

Be Wary of What Pops Up
You cannot escape sponsors, and Pinterest is no exception.
Someone needs to pay the bills for all the free services.


So by now, you have a pretty good idea of the things I like to pin.  Sometimes my main page comes up with some off the wall suggestions.  These are the pins companies pay to have show up in your feed.  You'll notice the words "Promoted By" next to a company's name.  The biggest one I see on mine is Dollar Shave Club, but sometimes I see some bigger names pop up.  What puzzles me when I see some of these pins is when they seem to have nothing at all to do with the rest pins in my feed.

Sometimes you will find pins in your feed that have awesome ideas.  Before saving them, I sometimes click on the link to see what the actual web page looks like.  There can be a lot of dead links out there.  No worries, the pictures themselves can still be a great inspiration for your work.

Because most of my pins involve woodworking, every so often I will see a pin showing "Over 10,000 woodworking plans!"  Sounds like a great idea, but many of these are scams out there to take your money and give you a bunch of ill-conceived or otherwise free plans available on the internet.  There is plenty of free plans out there, and if you do decide to purchase some, as I have in the past, be sure they are being sold be credible sources.  

Get Back in the Shop


Now that you have perused all kinds of great ideas, get back in the shop.  Just like its nice to browse all day at a bookstore without reading, you may find yourself adding all kinds of great Pins without putting any plans into action.

I rarely build anything exactly like it is shown on Pinterest, but I also rarely find any woodworking plans I follow to the letter as well.  In many cases I will print out the pictures from Pinterest and staple them to my shop wall.  In the picture below, you can see a lot of turning projects I have posted right above my lathe.

Use Pinterest as a springboard for inspiration and great ideas, but be sure to get back in your shop and put those ideas to use.  Don't forget to create your own board to show off the beautiful work you make in your own shop.

Pinterest is great for ideas, but be sure to get back in your shop to make things happen!

Monday, February 29, 2016

The Many Advantages of Wooden Spoons

Egyptian wooden spoons at the Louvre in Paris.
Wooden spoons have been a staple in the kitchen since there was nothing more than an open fire with a cauldron.  Wood was the most readily available resource to early man for making spoons, and could easily be fashioned into a concave surface with a handle.  Samples of wood spoons have been found from both the ancient Greek and Egyptian civilizations, proving their use from the advent of advanced civilization.


So how does the modern wooden spoon, after tens of thousands of years later, still find its way into the modern home?  The answer is simple - when cared for properly, wooden spoons still offer many advantages over the competition.

Plastic spoons can melt if left in a pot

Durability

Wooden spoons can last a long time is cared for properly. Hand washing between uses, a simple coat of oil now and then, and coating them with a wax product, such as cutting board conditioner will keep your wooden spoons in tip top shape for years to come. Never put them in a dishwasher, as the extreme heat in the drying process of the modern dishwasher will destroy any wooden items, causing them to crack.

Ergonomics

The size and shape of wooden spoons are appealing for the long term use of constant stirring or mixing.  The flat handles of most metal spoons do not compare to the much large handles with rounded edges, and may cause quicker fatigue with extended use and operation.

Metal spoons can get hot really fast if left in a pot.

Low Conductors of Heat

Unlike the metal cousins, wooden spoons will not get hot if you leave them in in the pot when you cook. While plastic spoons are also poor conductors of electricity, they can melt when exposed to extreme temperatures either in your pot or when submerged in hot oil.


Flexibility

When we talk about the flexibility of wooden spoons, we are not specifically referring to their ability to bend.  Wooden spoons can be used in cast iron, non-stick cookware, and in other metal pans.  They will not scratch the most popular cookware surfaces, prolonging the life of your pots and pans.


Always be sure to properly care for your wood
spoons.  Wash them regularly, and coat them
with oil and wood conditioner.


Beauty and Aesthetics

The gorgeous beauty of wood lending itself to a warm and inviting atmosphere in the kitchen.  All aesthetics influence our mood and behaviors, and wood is no different.  While it may sound a bit hokey, it definitely true.  The more wood and earth-type textures appeal to your senses, the more you will enjoy cooking when using wooden spoons.


Variety

Just like their metal cousins, wooden spoons come in a variety of shapes and sizes - except you can find even more variety with wooden spoons.  Think outside the big box store and their standard low end wooden spoons.  The local spoon carving artisan will have the ability to provide you the perfect size and shape of spoon you are looking for.


Function

An watched pot never boils, but leave it alone unwatched too long and it could boil over. Laying a wooden spoon across the top of the pot will prevent it from boiling over.  The lazy chef in me has tested this theory with great results.


Where to Get a Good Wooden Spoon

Once you hold a highly functional and classy wooden spoon in your hand, you can understand who its the choice of so many professional chefs in their own kitchen.  The next time you visit your local craft show, stop by your local wood worker's booth, and ask about the wooden spoons he or she offers for sale.  Or, send me an email at idlewoodworker@gmail.com for a custom made wooden spoon at a fair price.

Spoon carving is a true art, and there are people who dedicate
their whole craft to it.  Pictured above is some tools used to carve
wooden spoons and a few spoons I had in the process of being carved.


Saturday, February 22, 2014

My Favorite Woods

When I first started woodworking many years ago, I exclusively used 2x4s, 1x6s, and sometimes sheets of cheap, low-grade plywood because they fell into my budget.  As an added bonus, it wouldn't break the bank if I had to buy a few more pieces because I screwed something up in cutting.  The cheap everyday 2x4s you find in home store are usually made from spruce, not the best wood, but something great to learn on and keep a budget low.  These boards aren't really designed for fine wood working, more structural and framing work.  (So don't expect every board to be straight, have no knots, or be warp-free.)

When I started making cutting boards and scrolling, I decided to try a few other different, more expensive woods.  Although the wood does cost a lot more, I find not only the quality of the finished product, but also the ease with which some of these woods work make them worth the extra money.


Maple


Nothing beats the creamy texture of Maple for a clean, professional look.  No only is maple great for kitchen cabinets, it is my preferred base wood for all of the cutting boards I make.  Maple is a durable, tight-grained, and has tremendous antimicrobial properties, which makes it ideal for kitchen utensils and wooden bowls.

A maple bowl set up on the lathe.
Maple also looks great in furniture, and can brighten up any room if left natural (unstained).  Plus, how many other woods also produce a sap that tastes great with butter on your breakfast waffle.

Although I almost exclusively use hard maple, it comes in many other varieties such as soft, silver, black, and big leaf.  Depending on the tree, you may also hit a gold mine with irregular figuring, such as birds eye, curly, and tiger.


Purpleheart


Over eight years ago, when I first started making cutting boards, I stumbled on a rich, purple wood while at my local hardwood dealer.  Known as purpleheart, it is imported to the US from anywhere from Mexico to Brazil.  Purpleheart is usually straight grained and very hard.  Because of its price, I usually only use purpleheart wood for small turnings or as an accent color to large pieces.

There are two things about purpleheart wood I find very interesting as a wood worker.  First, it does very well around moisture and is fairly rot resistance.  Also, its color is very sensitive to the exposure of UV rays.  When it is first cut, it is a very deep brown-gray color.  After a day or so exposed to sunlight, it turns the beautiful purple color most of us are familiar with.  After quite some time (a few years) it can turn either a deep, dark, almost black color, or dark gray.  This would all depend on exposure to the elements and if the wood was coated with anything.  One way to protect the beautiful purple color would be to use a UV-protected finish, such as a spar urethane.

Animals for a Noah's Ark display, the elephant in Purpleheart and the male lion in Walnut.

Walnut


Walnut is an American classic, and was widely used for furniture during the time of American Colonization.  Although primarily a very rich deep brown color, the sapwood is extremely light in color and the heartwood may have shades of purple and red mixed in the brown.  It is common practice for a mill to steam walnut even out all of the colors into the recognizable brown color.  Although there are many different species of walnut around the world, most walnut you find in the US is either Claro Walnut from the western US, or Black Walnut from the eastern half.

I really like walnut for the interesting textures in the wood and the deep brown color it provides.  If you are lucky enough, you might also find some fantastic burl in your local hardwood distributor.  Walnut is quite durable, works very nicely, and looks great without staining.


Mahogany


Another species popular in woodworking during the Colonial Era was Mahogany.  Mahogany was heavily exported from the Caribbean to England and its American Colonies during the 18th century.  The rich reddish-brown hue and silky texture made Mahogany a highly demanded wood for furniture during this time period.  As a result of this, demand for Mahogany furniture want up, and a couple of hundred years later the supply of this species dwindled from over harvesting.

A few species different from the original, but similar in look, are used today.  The two I am familiar with are known as Honduran Mahogany and African Mahogany.  Honduran Mahogany is much rarer and more expensive than its African cousin.  Mahogany is still used today in the making of musical instruments for the warm tones it lends to guitars and other stringed instruments.


Mahogany is a pleasure to work with because it cuts and machines very easily while providing great rot-resistant properties and a beautiful finished product.  African Mahogany tends to be my wood of choice, mainly due to its availability and reasonable price.  Because of its higher price, Honduran Mahogany is often only used today by furniture repair specialists to replace the broken pieces within furniture during restoration.


Thursday, June 13, 2013

The Farmers' Market Experience

Olde Towne Farmers' Market


Mother's Day weekend of this year I officially set up my first retail space at the Olde Towne Farmers' Market in Portsmouth, VA.  I wasn't expecting to sell much, just enough to give me a little extra cash and some money to purchase new supplies and equipment for the workshop.  I stuck to a pretty basic layout and implemented a few ideas on ambiance from an artist friend of mine, Chad, who sells his blown glass.


Considering I did fairly well the first time out, I packed up my truck again this past weekend, and ventured out for Round 2 of the Farmers' Market experience. Between what Chad taught me, my formal education in business, and first-hand experience, the following are a few things I implemented.


Folding Tables Are Your Greatest Nemesis


It is really easy to pack up your boxes, grab a couple of table cloths, and pop open a couple of folding tables to display your wares.  That was my initial plan until Chad stepped in.  After many years as an artist and getting "Best In Show" at the Gosport Arts Festival, I figure Chad probably knows his stuff better than I do.  He was the one who taught me "Folding tables are your greatest nemesis."  The logic makes sense - while it may be easy for me to set up this way, it does not lend itself to the unique nature of my product.  Chad suggested I make pedestals and find other appealing ways to display my art.  One suggestion I really liked was to find a unique way to display my wine stoppers using wine bottles set at different heights.


Showcase Items With Varying Price Points


Many people may love your work, but either do not want to spend big bucks on your work or may not have enough to buy your really nice items.  The coming weeks before my first farmers' market, I spent a little extra time making small items.  Refrigerator magnets and small tins of cutting board conditioner were available right alongside my cutting boards and wine stoppers.  I will try to think of more ideas of items to showcase in the $5-20 range in subsequent shows.


Everyone Loves a Sale


A simple rule of economics is you can temporarily increase demand for a product by reducing its price for a short period of time - also known as a sale.  In order for your sale to have a chance to be successful, you have to give a very intriguing discount, advertise it, and make it a limited time off.  To try this experiment, I marked my cutting boards 30% off and advertised it on Facebook and with a bright yellow and black sign at the Farmers Market, so it could not be missed.  While at the Olde Towne Farmers' Market this past weekend, the organizers told me I would be permitted to post any sales on their Facebook page prior to the event.  


As a result of the sale, I sold most of my stock of cutting boards, had an online request to buy one, and even took order to make a few in the coming weeks and honor the sale price.  While I slightly reduced my profit margins per product, I almost quadrupled my sales from the previous month.  Find me a business person who would turn that down.


About Portsmouth, VA


For anyone looking to head to the Norfolk/Virginia Beach area, consider spending some time in Portsmouth.  It is a very nice city with a small town feel.  History buffs will love the many museums and ties to major events all the way back to the Early Colonial Era, as told by Colonel William Crawford and his friends.  For more information on visiting Portsmouth, go to http://www.visitportsva.com.


Wednesday, April 24, 2013

World's Only Reusable Tack Cloth

After working with wood for many years, you are always on the hunt for the quickest, cheapest, and most efficient methods to get your end result.  When you finish your final coat of sanding, the traditional method of prepping for finish is to use a tack cloth to remove all dust from your piece.  While using a traditional tack cloth can be effective, I didn't like their sticky feel, they could leave residue of your work, and since they are not reusable it could get expensive if you do a lot of woodworking.  A few years back, I searched for an alternative and found the same rag I use when waxing my car was also a great reusable tack cloth.


It is important to remove all sawdust before applying a finish.

Microfiber came on the scene fairly recently, but has already replaced many cloths for a variety of different reasons.  Microfiber cleaning cloths soak up more wet material than other rags, are less likely to scratch, and pick up more dry debris as well.  This last benefit is of particular interest in their application as a tack cloth.  Their ability to pick up microscopic particles, such as sawdust, make them extremely effective for surface prep.


One of the nicest features of using a microfiber cloth as a tack cloth, is the ability to reuse it time and again.  After a while, your microfiber cloth may become full and temporarily stop picking up sawdust.  A few good shakes will release a lot of the sawdust and it's back to picking up more sawdust.  This will only be effective a handful of times, so it's to keep a couple extra on hand.  Since they are so cheap, you won't break the bank keeping a half dozen in stock.

Notice how much sawdust the top of this microfiber rag picked up.

While microfiber cloths get the job done, there is still an ever so slight layer of leftover sawdust.  I normally finish off my project with a quick wipe of mineral spirits and let it dry.  I would typically do this with any method of dust removal, but I felt compelled to share this so as to produce the best finish on your handy work.


Besides being my favorite tack cloths, microfiber rags have many other great uses:

  • Automobile detailing
  • Dusting furniture
  • Polishing silverware or other metals
  • Drying dishes
  • Cleaning photography lenses


After your day is done, throw your microfiber rags in a washing machine with ordinary laundry soap.  When drying, it is important not to use fabric softner, the static is what keeps these workhorses at peak efficiency.  Many fabric softners leave a waxy residue that may also wreak havoc on the finish of your project.


Tuesday, April 9, 2013

Furniture Restoration Project - Cloning 80 Chairs

Andrea DiCarlo's LaBella in Ghent is a true gem of Norfolk, VA.  Every meal comes out to your table tasting great and its presentation is immaculate. Andrea's family has been in the restaurant business for generations, with recipes as authentic as teenage girl's crush on Justin Bieber.

It is because of this he surprised me when asking for help with a recent restaurant expansion..  I know nothing about restaurants except how to order a meal and eat the food, so I was definitely intrigued.


Original chair with fish-shaped hole.

The Concept


By expanding his restaurant, he more than doubled the indoor seating.  We talked about the tables and chairs the was going to use, but he was really interested in one thing - how to take the eighty-one chairs he purchased and give them a unique design.  Although the fish-shaped hole in these chairs was classy, he desired to create a more simple look for his seats.

A friend of his had carefully marked and cut the fish out of one chair to make a prototype of what he wanted.  The idea was basically to cut out a rectangle around the fish to give the chairs a much more simple look. A great idea, but ho do you replicate eighty-one chairs to look exactly the same?


Gluing the plywood strips along the curved back of the chair.

Sizing Everything Up


In order to clone the chairs, my idea was to make a template to fit on the back of the chair and run a router with a flush cut bit over the hole in the template.  Since the chair had a curved back, my plan was to laminate the template from 1/4" lauan plywood following the curved back of the chair.  Contact cement was the best bet for a strong hold and a quick dry on the template.  I used the prototype chair as a guide for my work.


An exact fit for every single chair.

Working On an Exact Fit  

The template also had to fit in exactly the same spot on the chair, not only vertically but also horizontally.  After laminating two layers of plywood, I used firring strips screwed to the the template to create a resting point on the top of the chair.  This way, the rectangular opening would be the same size and the same place on every chair.


New chair with rectangular hole.

Creating the Clones

Unfortunately, I did not have the necessary time to actually route the holes for these chairs.  Andrea's friend and employee, Victor, cut down all eighty-one chairs, stained the new wood, and applied polyurethane.  The chairs came out looking great, just like the rest of the restaurant expansion.

If you ever get a chance to come out to Norfolk, VA, stop by Andrea's La Bella in Ghent to check out the chairs and enjoy some of the best Italian food.  


Friday, March 1, 2013

Cleaning an Oil Stone

With so many woodworkers today using Japanese water stones, slow speed grinders, and advanced sharpening systems made by brands like Tormek and Work Sharp, the classic oil stone seems to have fallen by the wayside in popularity.  I personally like the oil stone method for two reasons, limited expense and low maintenance.  In many cases I do desire additional honing of chisels or hand plane irons, but will just use fine grit sandpaper with water or mineral spirits for lubrication.

Recently I wandered across an oil stone at least 60 years old whose surface was pretty heavily clogged.  It looked to be a nice stone and chose to revive it instead of tossing it.  I knew there were two main things I needed to expel from the stone: oil and built up minute bits of metal.

Finding a Proper Solvent


To remove the honing oil from the stone, I was going to need something fairly volatile with a low viscosity.  Not only should this solvent cut the oil from the stone, it would also most likely serve as a lubricant to expunge the tiny bits of metal.  It would also have to be fairly inexpensive, since I would need a good amount to soak the stone in.  After a little online research, I decided to try using charcoal lighter fluid.


Items Needed for This Task


Old Oil Stone
Cheap Plastic Shoebox with a Lid
Charcoal Lighter Fluid
Small Wire Brush
Scrap Wire
Safety Gear (goggles, gloves, respirator)


The Setup


Coil up the wire, pull it apart, and flatten it as much as you can, like in the picture.  The wire will be placed under the stone to slightly lift it and allow more surface contact between the lighter fluid and your stone. Place the wire in the container and the stone on top of it.  Pour the lighter fluid into the container and submerge the stone to at least the halfway point.  Put the lid on the container and leave it alone for at least a couple of hours.  It may take a while to work the oil out of stone, especially if it is an old stone.  I left mine overnight in the detached garage.


*** Do not attempt this project near any sparks, flames, pilot lights, or people smoking. ***

(They call it lighter fluid for a reason.)


Much, Much Later


After some time has passed, come back and check on your stone.  Look in the lighter fluid for blobs of oil.  I found some at the bottom of mine, even though the stone had sat untouched for decades.  You might also find some very fine black or dark gray bits of metal in the fluid.

At this point, you may want to wear rubber chemical gloves, the lighter fluid can dry your hands out pretty bad.  I also might suggest doing the next step wearing goggles and in a well-ventilated area.  You may also choose to wear a respirator, the fumes can be pretty nasty.

My stone was still caked pretty good, so I decided to hit it with a small wire brush.  These are great tools for restoration and can be found with the welding supplies at your local big box store.  Working it with the wire brush helped the gunk was slowly come out.  I found the best method was briskly rubbing in a circular motion,dipping the brush in the lighter fluid to wash it out and keep the stone lubricated.  The wetter you keep the stone, the easier and faster this process will be.


Conclusions


After a few overnight soakings coupled with scrubbing, my stone ended up 95% cleaner.  I will say there are a few select areas I was having trouble completely cleaning.  I think this process maybe good for regular oil stone cleaning, but is probably not the best for reviving a age old stone to its former glory.

I may consider coming back and soaking again, using a wire cup brush on my angle grinder if necessary.  Then again, I may search online for another method just to try something different.  If you have any other ideas, please leave them in the comments section - I would love to hear from you.


Thursday, February 14, 2013

A Classic Hand Saw Like This Is Hard to Find

There was a time when most every household in America owned a hand saw.  This hand saw was sometimes used for making furniture and cabinets, but the majority of the time it was used to make repairs around the house or build things necessary for everyday living.  Electric circular saws were too expensive for the average person to afford, so the need for a good crosscut was paramount.  It always had a comfortable wooden handle, was usually 26" in length, had a minimum setting of 10-12 tpi (teeth per inch), was made in the US, and it bore a medallion of the saw manufacturer on the handle.

I recently was given the opportunity to try out a saw that fit this same criteria, the Great Neck N2610.


My Search for a Modern Saw

Walk down the hand tool aisle of your big box stores today and you will find quite a few differences between the tools of today the classics of yesterday.  Most crosscut saws today feature carbide teeth, set at 6-8 tpi, with plastic handles. They butcher end grain and are less comfortable than the saw our parents and grandparents used.  I also found most hand saws today are 20" in length.  These tools are made to use, abuse, wear down, and throw away.

The other hand saw option you have is to purchase a very expensive high end saw at a woodworking specialty store.  I have no quarrel with these saws, they are very nice and high quality.  Attached to the high quality is also a high price tag.  It is relatively impossible to find a saw in this category for less than $100.  My purpose was to find a solid hand saw the average American could afford on a budget.


The Great Neck N2610

I emailed the Great Neck Tool company after reading a few Amazon.com reviews of this product.  Within no time, they sent me a N2610 in exchange for an honest review of their product.  I was a big fan of the this saw from the moment I held it.  I became a very big fan after cutting my first piece of lumber.  Here is how this saw stood out from the pack:


Comfortable Handle

The handle was large and made of wood.  My hand slid in and it fit well, offering the opportunity to saw comfortably for a long period of time.  I also found the wood easier to grip than many of the plastic handles out there today.  Anyone who has ever done a lot of hand sawing will tell you this is probably one of the most important features of a hand saw.


The Cut

When you look at tpi, you have to balance speed of cutting with the quality of the cut.  The lower your teeth per inch, the faster the cut and the rougher the finished product.  Although it may not seem so, there is a big difference between 8 tpi and 10 tpi.   In my opinion, the best cut for a beginning woodworker comes from a 10-12 tpi saw.  The Great Neck N2610 was no exception, it cut effectively without shredding the edges of the end grain.  A quick clean up with a file and some light sanding will leave the edge of your work ready to accept stain.


Full Sized

Apparently, I missed the boat somewhere.  When did a 20 inch saw become the standard?  To my knowledge, Disston Tools, America's leading hand saw maker for over a century, did not manufacture a 20" standard cross cut saw.  If you use the entire length of the saw, a 26" hand saw cuts much faster than a 20" model.  The full 26" length of this saw was definitely a feature I liked.


A Few More Details

After speaking with a company representative, I learned Great Neck has been producing this exact same saw for about 30 to 40 years without any changes in design.  Although improvements have been made to the process, the product itself has remained untouched.

Another thing which hasn't changed is where these saws are manufactured.  The N2610 is a proud product to wear the label "Made in the USA."  Around since 1919, Great Neck Tools started out in the tool industry making saws in this country, and it still makes them here today.


Care for Your Handsaw

The blade of this handsaw is a chrome nickel steel blade with a water based lacquer, pretty much an industry standard for your general hand saw.  After you are done sawing for the day, Great Neck suggests a light coat of oil be applied to prevent any rust from forming on the blade.  I gave mine a quick shot of AmsOil on a rag and a light wiping and the saw was ready for storage until the next project.


Conclusions

The saw was a real pleasure to cut with and left a nice edge for any saw under $30.  This saw cut just as well as a Disston I own, perhaps even a little better.  I feel with its features at the price point given, you would be hard pressed to find a better saw.  In fact, citing reasons previously stated, I believe this saw is in a category all its own.


You can read more about Great Neck Tools, the multiple brands they own, and the wide array of tools they produce at the website www.greatneckbrands.com.  


Monday, February 11, 2013

DIY Non-Marring Hammer with an Old School Twist

When disassembling furniture for repair, it is important to keep the parts in pristine condition so when reassembled you can make the piece look brand new.  Sometimes softer woods have a habit of very easily taking dents or nicks.

I ran across a situation the other day where I was disassembling a piece of knotty pine furniture and needed a non-marring hammer to break apart glued joints.  I started by using a rubber mallet, but had to stop when I found it left some dents in the wood.  Wanting to preserve the pieces in their original condition, I knew another solution was out there.

I recalled a while back reading up on furniture restoration, a hammer wrapper with rags could be a substitute for a non-marring hammer.  This sounded like a good time to put it to the test.


To make my hammer, I used:

- 3 pound sledge hammer (or other hammer with flat ends)
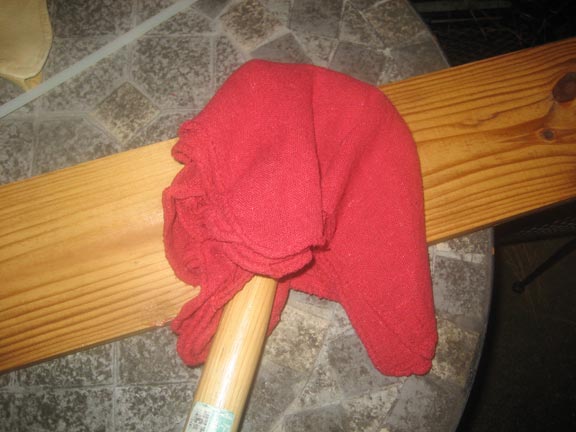
- 8 shop rags
- 1 large zip tie


Step 1


Lay all 8 rags flat and place the hammer in the middle.

Step 2


Wrap your rags as evenly as you can around the head of the hammer.


Step 3


Put a zip tie around the rags as close tot he head of the hammer as you can.  To tighten it very tight, use a pair of pliers to pinch near the excess zip tie material and rock it back and forth.  After it is snug, cut off the end of the zip tie.


To my surprise, this hammer left no dents or marks in the wood even though I swung it very hard.  Making it took less than five minutes, but the best part is it was made for free with things most of us already have lying around our garage.


Tuesday, January 15, 2013

Removing Rust with Electrolysis

In a recent post, I talked about the benefits of hand tools and how there are some really good finds out there to be had.  Let's say you are looking at some tools at a yard sale, thrift store, or other second hand shop, and you find something you are really interested in purchasing.  After testing it out, it seems to suit your interest very well, except it is covered with rust.  A little surface rust is no big deal, some steel wool and an oil-based lubricant will clean it up very well.  However, major rust can be a real downer on a prized piece.


I recently came across an anvil that my grandfather frequently used long before Ronald Reagan entered politics.  After he passed away, my grandmother had covered it with water-based yellow and used it as a conversation piece in her garden.  Left untouched for many years, the surface rust was considerable.  After some research, I considered electrolysis to be my preferred choice of rust removal.


Taking proper precautions, electrolysis is very simple and is one of the most environmentally friendly methods of rust removal.


Why Electrolysis?


Electrolysis would remove not only the rust, but also all paint on the anvil, leaving a nice shiny bare metal surface.  In addition, electrolysis would give me much greater control over how much material would be removed and how evenly I can remove it.  With a wire brush I would be challenged to leave the smooth surface I desired, and although chemical rust removers may work well, getting into the small crevices and hard to reach places could present a challenge.


Precautions


Remember, as the name "electrolysis" suggests, you will be working with electricity.  If that makes you uneasy, stop and find another method.  I really suggest having a commanding knowledge on the basics of electricity before you go any further.


Second, there are some mild chemicals involved with this process.  While there are no strong acids, we are using washing soda, which could cause irritation or more severe problems if it comes in contact with skin or eyes.


You should take proper precautions when dealing with any chemicals, including proper clothing, eyewear, proper ventilation, and chemical resistant gloves.  The chemical reaction will make hydrogen gas, which can be flammable.  Never do this near pilot lights or any other type of fire or flame.

In addition,  while you may understand the intricacies of this operation, it is important this process be done in a secluded area away from others who may not understand its danger.  Children and animals should remain away from this area for the entire process.  My dog has a habit of eating cat poop, so I could imagine her trying to drink the water if given the opportunity.


Not for All Tools


While electrolysis is a great method of rust removal, it is not for all tools.  I would not suggest sticking anything which could be damaged by water into solution.  Any types of wood, basic electronics, or moving parts must be removed.  This method effectively works best for bare metal.  Some disassembly may be required to efficiently clean your tools.  


The Setup


For assembly of the electrolysis tub, gather the following supplies:
  • 12 gauge wire
  • steel rebar
  • scrap steel wire
  • plastic 10 gallon tote
Cut fours pieces of  rebar that are 1-2 inches longer than the height of your plastic tote.   To secure these as posts in the four corners of the plastic tote, drill two holes near the top of each corner, loop the wire trough the holes and around the post, then twist the ends together snugly.

After the posts are secure in each corner, take four pieces of copper wire and strip about two inches off each end.  The wires should be slightly (25-50%) longer than the full length of your plastic tote.   Wrap one end of each wire securely around the top of each rebar post, then twist all four ends together at the top, forming a pyramid shape with the wires.  These wires must stay above your electrolysis bath during the rust removal process.  Congratulation, you just formed the anode, which will connect to the red clamp on you battery charger.

Now you will create the cathode piece, which will connect your work to the black wire.  The best method I found is to suspend your rusted metal in the water with a bare copper wire wrapped around it.  In the picture to the right, I wrapped the anvil in bare copper, then secured this wire to the white wire, wrapped the 1x2 scrap of wood.  Fill your tote with water, and one tablespoon of washing soda per gallon.  Stir it up and completely submerge your rusted tool in the solution.


Turn On the Juice


Be sure your battery charge is unplugged.  Connect the red clamp to the twisted wire at the top, or the anode.  Connect the black clamp to the wire leading you your rusted metal.  Now get ready for the magic to happen and plug in your battery charger.  I used the setting for 2 amps on 12 volts.  Stand back.  Wow . . . really . . . nothing?  Do not be fooled, it's happening, but very slowly.  Do you see bubbles forming on your tool?  That is hydrogen gas escaping.  The first time I did this, I didn't see the bubbles.  So I added more washing soda, with the battery charger turned off of course.  When you see the bubbles, you know it's working.  Now, don't touch the water and leave it alone for a while.

Check it every hour or so.  Is there muck floating on the surface?  Then the electrolysis is working and the rust is coming off your tool.  In my case, the paint was coming off as well.  After about four to five hours, I cut everything off, pulled the anvil out, and gently scrubbed it with a steel brush.  The bare metal underneath was now showing.  I dropped it back in the solution and plugged everything back in.  Every hour or so after this, I pulled out the anvil and brushed some more crud off until I had a really clean final product free of paint and rust.


Over 40 years later and the anvil was looking great and ready to use again.  The last step of any electrolysis rust removal is to prevent future rust.  Paste wax, linseed oil, laquer, or whatever method you wish is fine.  I put a decent coat of AmsOil to make this anvil project complete.  You can also save the solution after you are done, and reuse it on future projects.


New Life


As previously mentioned in The Importance of Old Hand Tools, the durability of hand tools over 30 years old is very good.  With electrolysis as another weapon in your arsenal of antique restoration methods, you can safely and efficiently remove rust from many classic pieces.  Find your next gem in someone else's rusted pile of long forgotten tools, bring it back to life, and put it to use in your own shop.


Friday, December 7, 2012

The Idle Woodworker Blog was Featured on About.com


I would like to thank Ryan Kunkle from the Railroad Museum of Pennsylvania for featuring my Christmas Platform blog post in his About.com Model Railroad Blog a few days back.  Ryan has some great articles regarding designing and setting up very aesthetic model railroad scenes.

A big reason any I began blogging at the end of last year was the limited information available for certain projects, such as a Christmas Train Platform.  By sharing information and things I have learned, I was hoping to inspire others in their own projects.  

Keep an eye out for upcoming posts as we finish up 2012 and head into 2013.  

I promise to finish the Depression-Era Vanity I introduced you to back in June, as well as test drive and review a hand saw the Great Neck Tools company will be sending my way.  A few other things in the works are farmhouse-inspired kitchen pieces I designed, removing tool rust with electrolysis, and some tools I originally thought were limited, but now cannot live without.

As for the Minwax Facebook contest, I did not win the big trip, but still receive a great consolation prize.  Congrats to Tom P. of Indiana, PA for his truly wonderful restoration of a family heirloom grandfather clock.  I really appreciate all of your votes, it is wonderful thing to know your work is truly appreciated.

Tuesday, November 27, 2012

Shop Safety - Which Safety Glasses are the Best?

I once asked a wise and experienced wood worker, "Which safety glasses are the best?".  His answer was simple - "The ones you wear."

If you've ever tried using an uncomfortable pair of safety glasses, then you completely understand the answer.  You got to a store, look at all the safety glasses in their blister packaging, and wonder two things - are they safe and how much do they cost.  You accept since they are protective eye wear, they may not be the most comfortable glasses you have ever worn.

But recently, I stumbled into my local Woodcraft store in the Norfolk/Virginia Beach area and ran across a display for their safety glasses.  I have been looking for a good pair for some time now and willing to shell out $20-25 for a comfortable pair.  They had samples to try on, which was a welcome addition to the standard guesswork.

Fastcap Safety Glasses
What a difference in the feel of these glasses and other eye protection I have worn.  They not only are comfortable, the way they wrap around and contour my head give me an unobstructed view and good protection from flying debris.  And at $6 a pair, it was a price that wouldn't break the bank.

Online Woodcraft Fastcap Safety Glasses Page

On Sunday I had some modifications to my lumber storage to make, so I tried them out.  Comfortable and good protection, as I had expected.  Two thumbs up for safety, and a choice I can comfortably work with in the shop.


For those who are interested in additional options, Fastcap safety glasses at Woodcraft come in clear, dark, amber, mirrors, with bifocals, and as googles.


Wednesday, November 14, 2012

Building with Pallet Wood other types of Reclaimed Lumber

There are many times woodworkers search for alternative sources of lumber to get the look, texture, or pricing they desire, since the conventional sources of wood may not easily give the desired end product.  When trying for a vintage look or working within a desired budget, these secondary choices can supply a plethora of wood that cannot be found at your big box home improvement store.

On a recent post, I discussed building a project out of pallet wood.  Pallet wood and other sources reclaimed lumber can give a project a great vintage look, but there are a few cautions your should follow whenever selecting and working with it.  For the purposes of this article, I will break down the category of reclaimed lumber into two groups, newer lumber and old lumber.

New Lumber

Newer lumber was harvested within the past 10 or so years and can be easy to find and very inexpensive.  In fact, most sources are completely free, providing you supply the labor and transport.  The best example of this is pallet wood.  There are so many books, websites, and other sources out there reclaimed covering pallet wood construction projects.  As a matter of fact, a Google search of "pallet furniture" results in almost 2.5 million web results and almost 3 million web images.  Its popularity is without question - free wood is a hot trend in today's questionable economy.

However, it would be best err on the side of caution when building with pallet wood.  Many times pallet wood is treated with insecticides and herbicides, and may be contaminated with bacteria if it as used to transport food.  I personally would never build something to go inside my home.  Additionally, if you build anything meant for children or animals, it is best to use another type of lumber.  A good example of what I feel comfortable using pallet wood for is the Halloween graveyard fence project.  Not all pallet wood is harmful, but it is near impossible to determine which wood has been treated and which is untreated.

Old Lumber

Old lumber can be very old, even dating to the 19th century, and may have once been siding or structure of an old building.  Sometimes old barns or sawmills may have lumber stored in them, or the reclaimed would can come from boxcars, mine shafts, or flooring.  Pine and oak are most common in my state, Virginia, but other areas of the country may have different species of wood.

Old lumber is a great source of well seasoned wood, but it is not without hazards.  Sometimes insect infestations, wood rot, mold, and fungi have ravaged these buildings.  In addition, many of these old building were painted with lead paint.  Although the painted surface may have a great patina and show a well worn look, I personally would not construct anything with still had the original lead paint on its surface.  I also would never construct anything for children made from this wood.

Rough Sawn and Full of Nails

All reclaimed number may have instances where nails and a rough cut surface would exist, so it is best handled carefully with work gloves.  It is best to plane or sand the wood to a smoother surface if you expect frequent contact these pieces.  Again, for a Halloween decoration in your yard, rough cut may be great, but for a bench it will be best to have a smooth, splinter-free surface.

Before cutting, planing, or drilling, you will definitely want to remove any old nails or fasteners.  Tap them with a hammer on the sharp side and use scrap wood to get good leverage and protect your product when prying them out with the claw of your hammer or pry bar.  Run a metal detector over the wood and make sure there isn't anything left behind.  Sometimes the heads of old rusted nails may break off and get stuck in old lumber, leaving a damaging and dangerous situation when working with power tools. These can be removed by tapping them out  from the backside with a small punch.

Specialty Woods

In some cases there are specialty woods which may be salvaged for their grain, color, hardness, resistance to rot, or possibly another reason.  A good example would be Teak, which is often used outdoors and on boats for its resistance to rot.